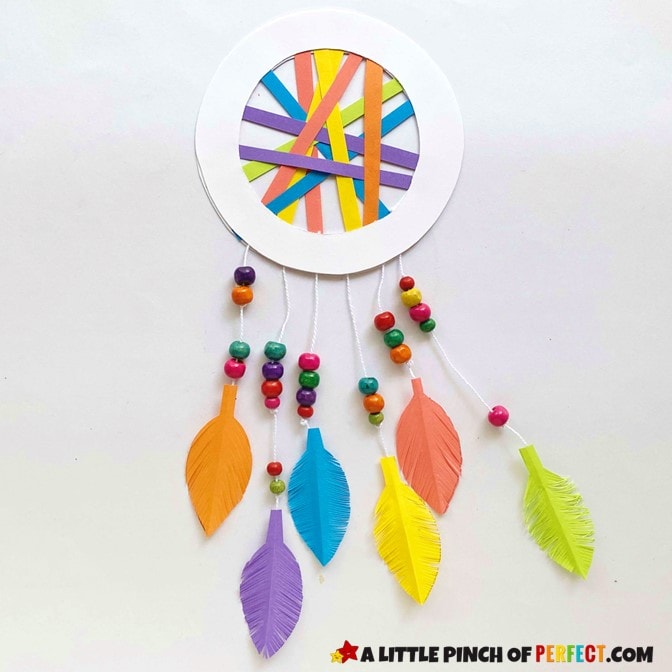
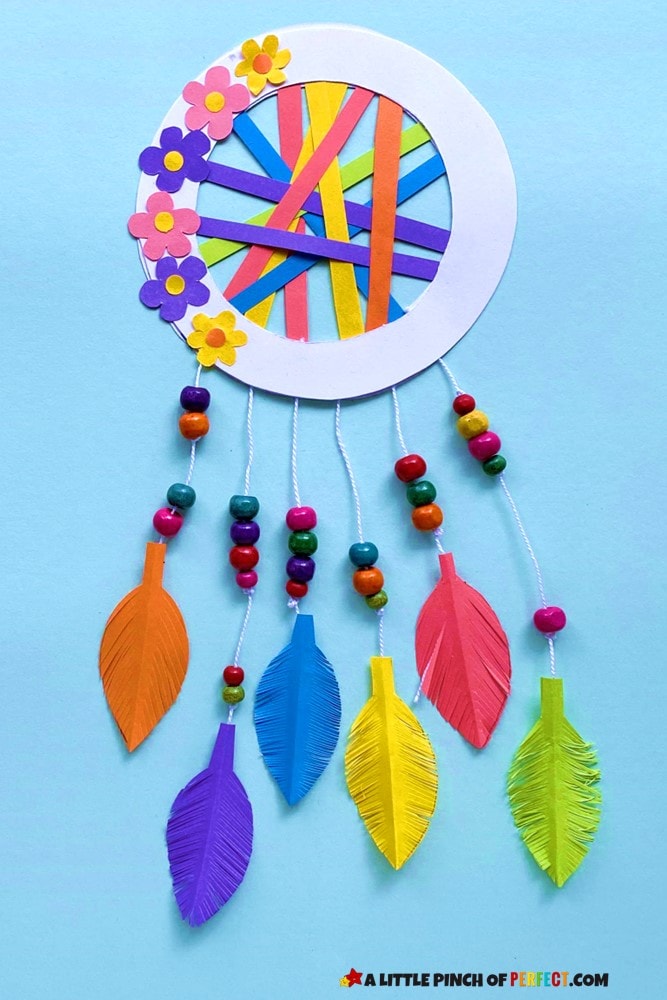
Learn how to make a dream catcher for kids craft with a free template and directions. We’ve made it so SIMPLE, it’s FUN for kids of all ages! They can make their own dream catcher to hang in their bedroom and think good thoughts during the night.
Thank you for visiting. This post may contain affiliate links to recommended products at no extra cost to you. Read our Disclosures and Terms of Use. Don't miss out again, become a Reader here
We have taken the beauty of the dream catcher and made a simple dream catcher craft that children of all ages can enjoy! Our craft has simple instructions and a free template that you can print to make with your kids.
This craft is fun to make at any time to help children catch bad dreams, learn about Native Americans crafts, or as a DIY decoration to hang in their room.
Dream catchers were originally created by some Native American tribes. They consisted of a wooden hoop that had a “web” woven inside to catch the bad dreams. Dream catchers would be hung above an infant’s cradle and could be decorated with charms, beads, and feathers. (Wikipedia: Dreamcatchers)
Click photos: Affiliate links to more information on these items we love! (Purchases through affiliate links earn us a small commission with no extra cost to you. See our Disclosure Policy here.)
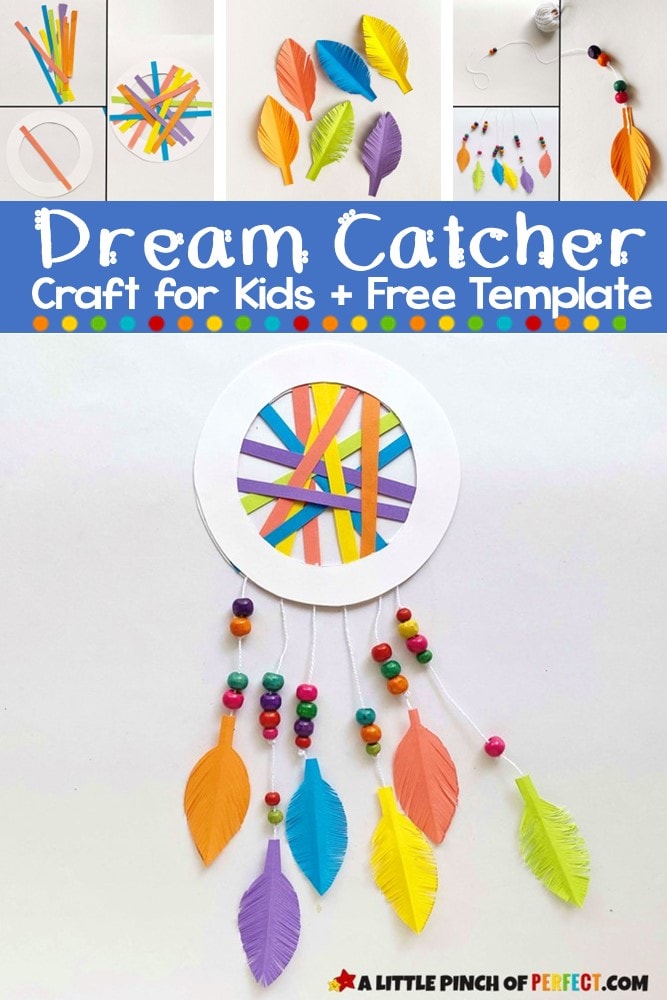
If you like our Dream Catcher Craft I would love for you to PIN IT! It helps you SAVE the idea and others discover it too, which lets us bring you more AWESOME CONTENT like this.
Depending on which *options* you choose from the directions will alter what supplies you need and how your craft will turn out.
For your convenience, printable directions are available at the end of this post.
To Make the Hoop of the Dream Catcher:
Option 1: Print the template on white paper and cut out the circle hoop.
Option 2: Cut out the center of a paper plate and use the edge of the plate as the dream catcher hoop.
To Make the Dream Catcher Decorations
Option 1: Cut out the flower petal, flower center, and feather template. Trace the templates onto colored paper and cut out the craft pieces. Do this method if you want to save your printer ink.
Print the colorful template out on white paper and cut out the template pieces. Do this method if you want to save time.
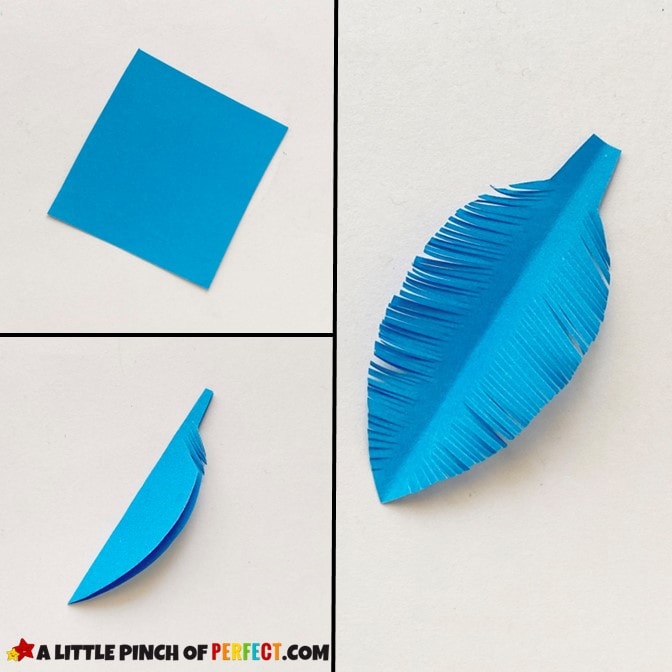
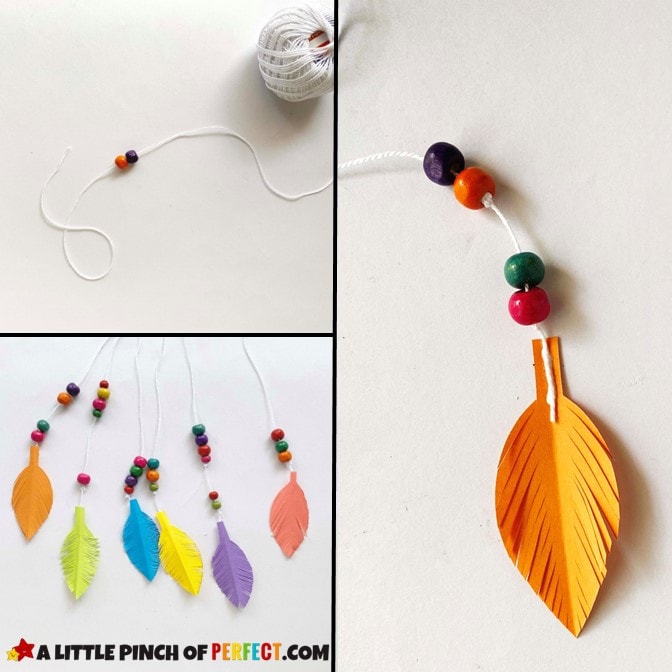
To Make the Paper Feathers:
Fold each feather in half and cut small diagonal cuts along the edges to give them a feathery edge.
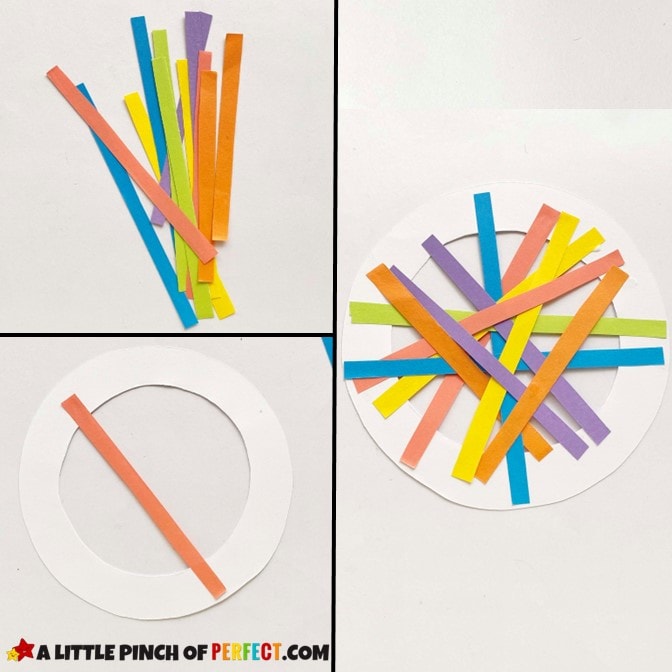
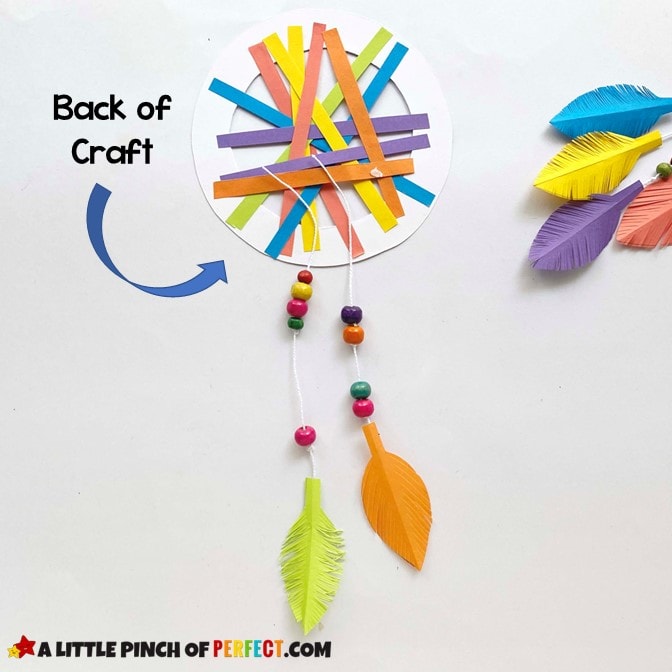
To Make the Center of the Dream Catcher :
Cut out thin paper strips and glue them from one edge of the hoop to the other. This makes this craft great for kids of all ages since it doesn’t require lacing.
You could certainly use a hole punch to make holes along the hoop and weave string throughout the holes for a more traditional dream catcher pattern if you would like.
To Make the Tassels of the Dream Catcher:
Cut a piece of string and thread beads on the string. This is great fine motor skills practice. If you want the beads to be separated, tie knots in between the beads. Children may need help tieing knots.
Make sure to tie a knot underneath the last bead and leave 1/2 inch of string at the end, after the knot.
Glue a feather to the end of the string. If your glue is not working you can try clear tape.
Repeat until you have as many tassels as you would like.
Glue the other end of the tassel to the bottom of the dream catcher.
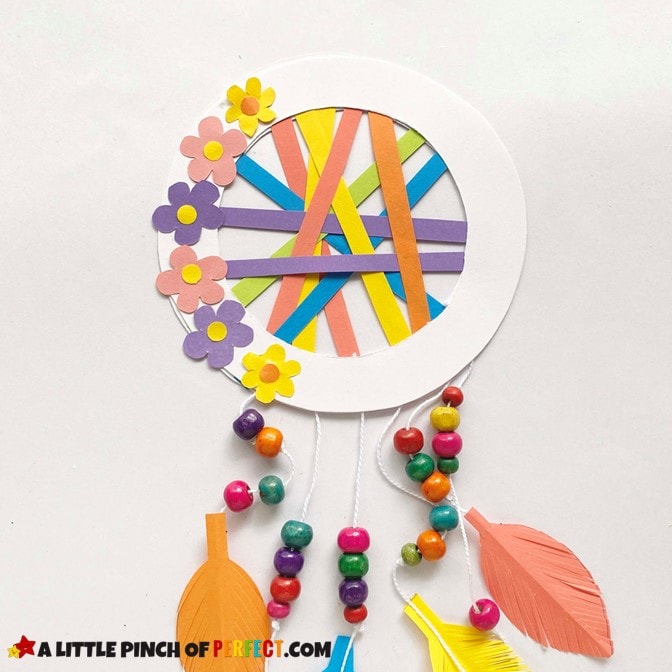
To Decorate the Edge of the Dream Catcher Hoop:
Glue the flower centers onto the middle of each flower. Then glue the flowers to the dream catcher hoop.
If your child isn’t into flowers they can always cut their own design or use markers to draw decorations on their dream catcher.
It would also be fun to glue gemstones, buttons, or other craft supplies to the hoop to give it a textured look.
Once the glue has dried the dream catcher is ready to be hung up for all to admire.

Don’t see the box? Click Here to download the template.

Directions on how to make a dream catcher craft out of paper with the free template. Includes paper feathers, flowers, and circle template.
Total Time 15 minutes mins Keyword: Craft, ThanksgivingOption 2: Cut out the center of a paper plate and use the edge of the plate as the dream catcher hoop
To Make the Dream Catcher DecorationsOption 1: Cut out the flower petal, flower center, and feather template. Trace the templates onto colored paper and cut out the craft pieces. Do this method if you want to save your printer ink.
Print the colorful template out on white paper and cut out the template pieces. Do this method if you want to save time.
To Make the Paper Feathers: Fold each feather in half and cut small diagonal cuts along the edges to give them a feathery edge. To Make the Center of the Dream Catcher :Cut out thin paper strips and glue them from one edge of the hoop to the other. This makes this craft great for kids of all ages since it doesn't require lacing.
You could certainly use a hole punch to make holes along the hoop and weave string throughout the holes for a more traditional dream catcher pattern if you would like.
To Make the Tassels of the Dream Catcher:Cut a piece of string and thread beads on the string. This is great fine motor skills practice. If you want the beads to be separated, tie knots in between the beads. Children may need help tieing knots.
Make sure to tie a knot underneath the last bead and leave 1/2 inch of string at the end, after the knot.
Glue a feather to the end of the string. If your glue is not working you can try clear tape. Repeat until you have as many tassels as you would like. Glue the other end of the tassel to the bottom of the dream catcher. To Decorate the Edge of the Dream Catcher Hoop:Glue the flower centers onto the middle of each flower. Then glue the flowers to the dream catcher hoop.
If your child isn't into flowers they can always cut their own design or use markers to draw decorations on their dream catcher.
It would also be fun to glue gemstones, buttons, or other craft supplies to the hoop to give it a textured look.
Once the glue has dried the dream catcher is ready to be hung up for all to admire.